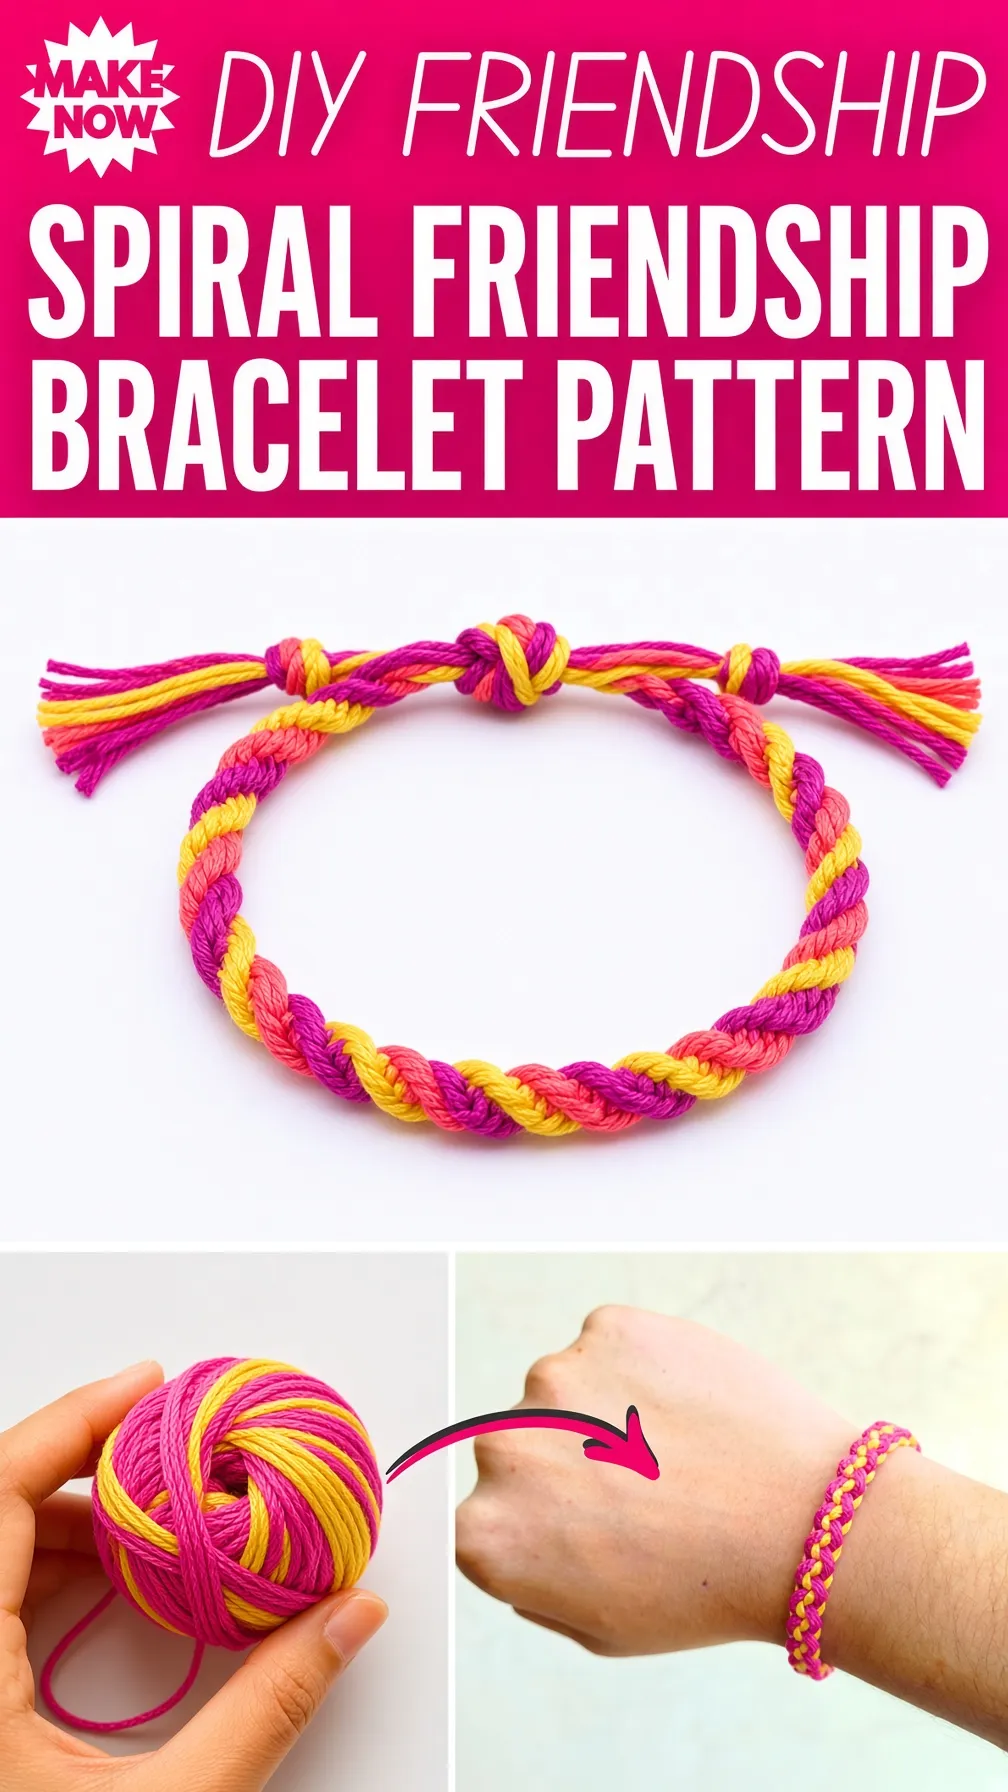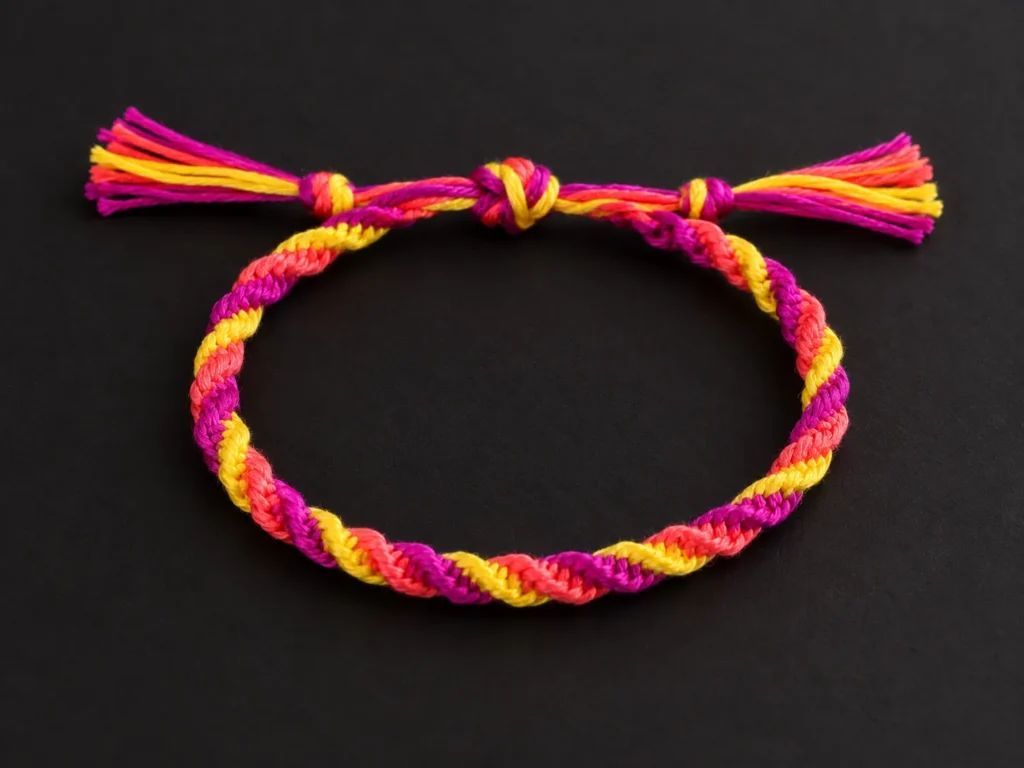
If you want a simple bracelet project that looks colorful and impressive without using complicated knots, this spiral friendship bracelet is a great place to start.
This pattern uses embroidery floss and one easy repeating knot. As you work, the bracelet begins to twist naturally, creating the spiral effect without any special shaping. You can make it with two colors, three colors, or even five colors depending on the look you want.
It is a beginner-friendly project that works well for gifts, friendship bracelets, summer crafts, and quick handmade accessories.
What Is a Spiral Friendship Bracelet?
A spiral friendship bracelet is made by repeatedly tying the same type of knot around the remaining strands.
Instead of alternating sides to keep the bracelet flat, you keep working with one color at a time. Because the knots are made repeatedly in the same direction, the bracelet starts to twist naturally.
Then you switch to another color and repeat the same process.
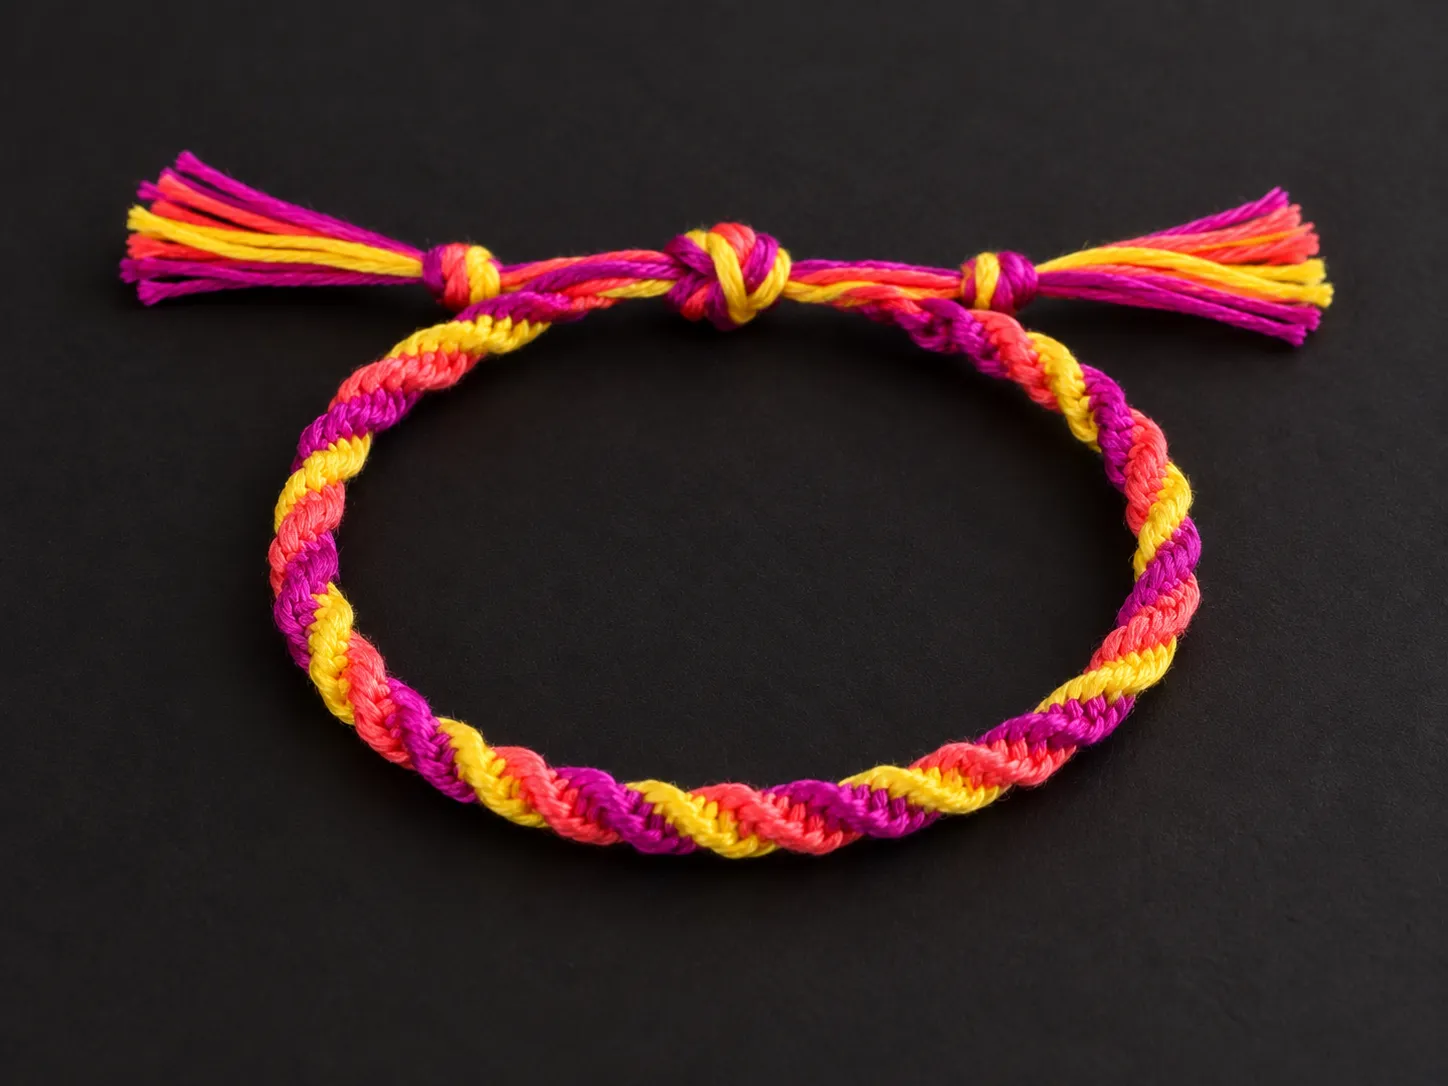
This creates colorful sections that wrap around the bracelet in a spiral.
Why This Bracelet Is Great for Beginners
This is a simple project because you do not need to learn several complicated knotting techniques.
You mainly need to remember one sequence:
- separate one working color
- cross it over the other strands
- pass it underneath
- pull it through
- tighten
- repeat
Once you understand the first color section, the rest of the bracelet follows the same method.
It is also easy to customize because you can change:
- the number of colors
- the size of each color section
- the overall bracelet length
- the order of the colors
Materials You Will Need
To make this spiral friendship bracelet, you will need:

- embroidery floss
- scissors
- ruler or measuring tape
- tape
- flat work surface
You can choose as many embroidery floss colors as you like.
For a beginner project, 2 to 5 colors works well.
This tutorial uses 3 colors.
Choosing Your Colors
You can use:
- three contrasting colors
- three pastel colors
- rainbow shades
- school colors
- holiday colors
- two shades of the same color
- neutral colors for a more minimal look
Using three clearly different colors can make it easier to follow the pattern while learning.
Safety Note
Be careful when using scissors.
Cut away from your hands and fingers, especially when trimming the embroidery floss at the end of the bracelet.
How to Make a Spiral Friendship Bracelet
Step 1: Measure Your Wrist
Start by measuring around your wrist with a ruler or measuring tape.
Take that measurement and:
- double it
- add 3 additional inches
This gives you the approximate length needed for each strand of embroidery floss.
For example, if your wrist measures 6 inches:
- 6 × 2 = 12 inches
- 12 + 3 = 15 inches
You would cut each piece of embroidery floss to approximately 15 inches.
This extra length gives you room to make the knots and tie the finished bracelet.
Step 2: Cut the Embroidery Floss
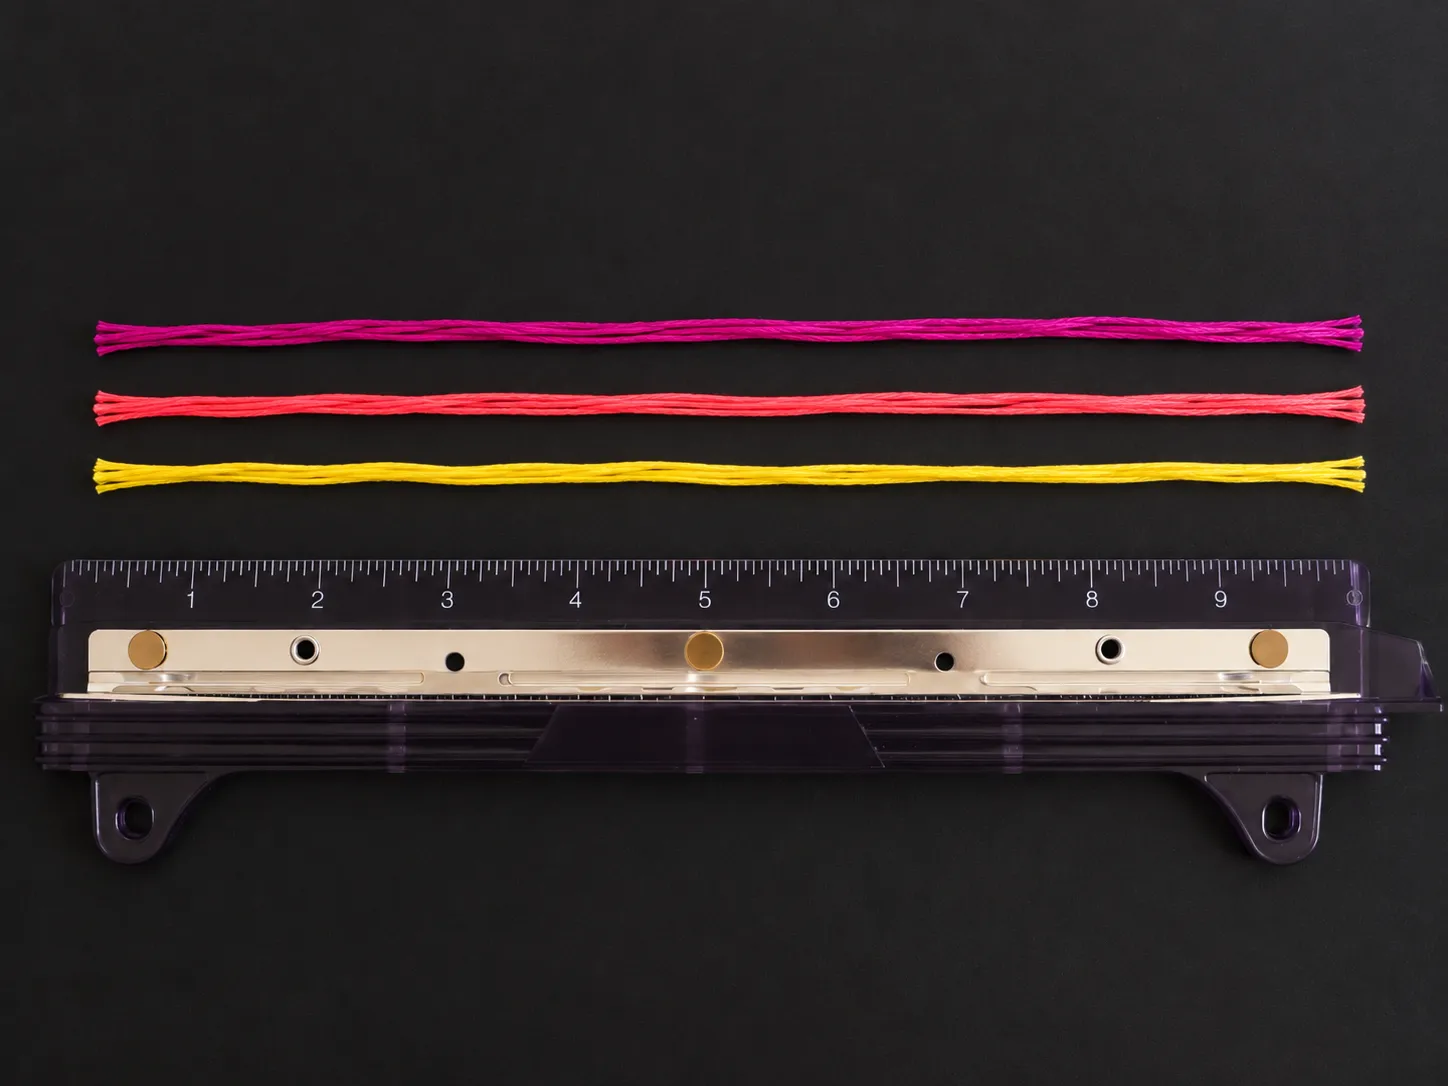
Cut one strand in each of your chosen colors.
If you are making the bracelet with three colors, you will have three strands.
Try to make all strands approximately the same length.
Keep them together before moving to the next step.
Step 3: Tie the Starting Knot
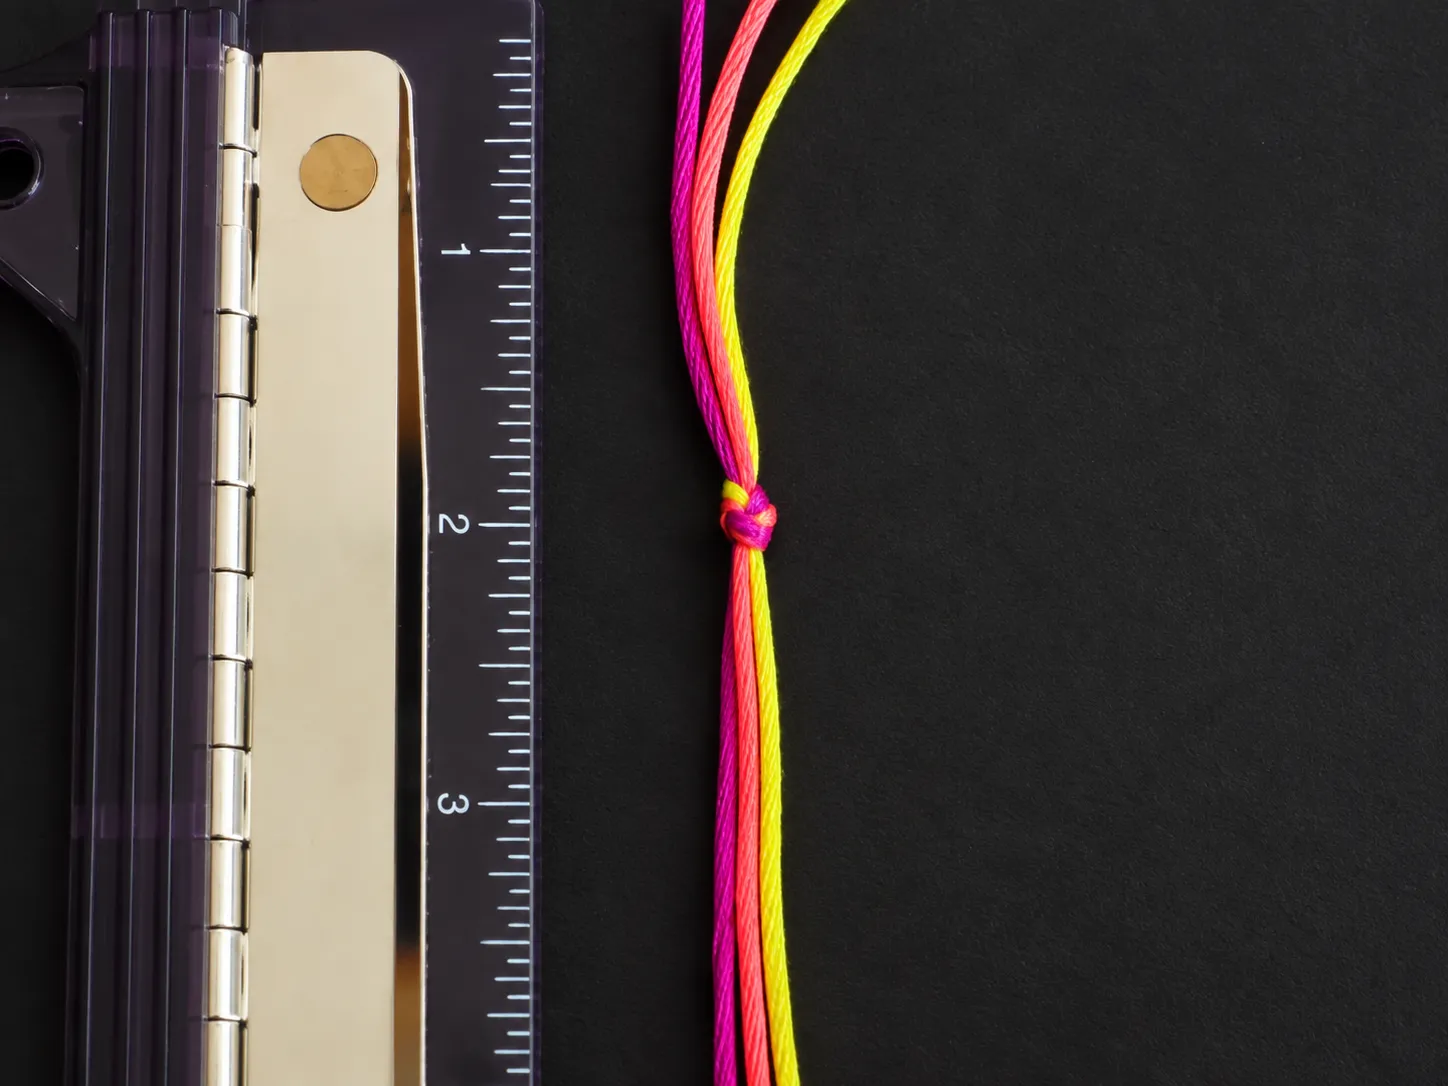
Gather all of your embroidery floss strands together.
Tie a knot near one end.
Leave approximately 2 inches of loose floss above the knot.
Do not trim this section.
You will use the extra floss later to help tie the bracelet around your wrist.
Step 4: Secure the Bracelet to Your Work Surface
Place the bracelet on a flat surface.
Use a piece of tape to secure the loose end above the starting knot.
The strands should hang downward toward you.
Keeping the bracelet secured makes it much easier to control the thread while making the knots.
Make sure the tape is firm enough that the floss does not move every time you tighten a knot.
Making the First Spiral Color Section
Choose which color you want to appear first.
In the example pattern, the first color is purple.
Step 5: Separate the First Color
Take the first embroidery floss color and move it away from the other strands.
The remaining colors should stay together in one group.
The separated strand becomes your working thread.
Step 6: Cross the Working Floss Over the Other Strands
Take your selected working strand and bring it over the grouped strands.
This should create a loop beside the other floss.
Keep the remaining colors together while you work.
Step 7: Pass the Working Floss Underneath
Bring the working floss underneath the grouped strands.
Then pull it back through the loop on the same side where the working thread originally started.
You should now have a loose knot wrapped around the other colors.
Step 8: Tighten the Knot
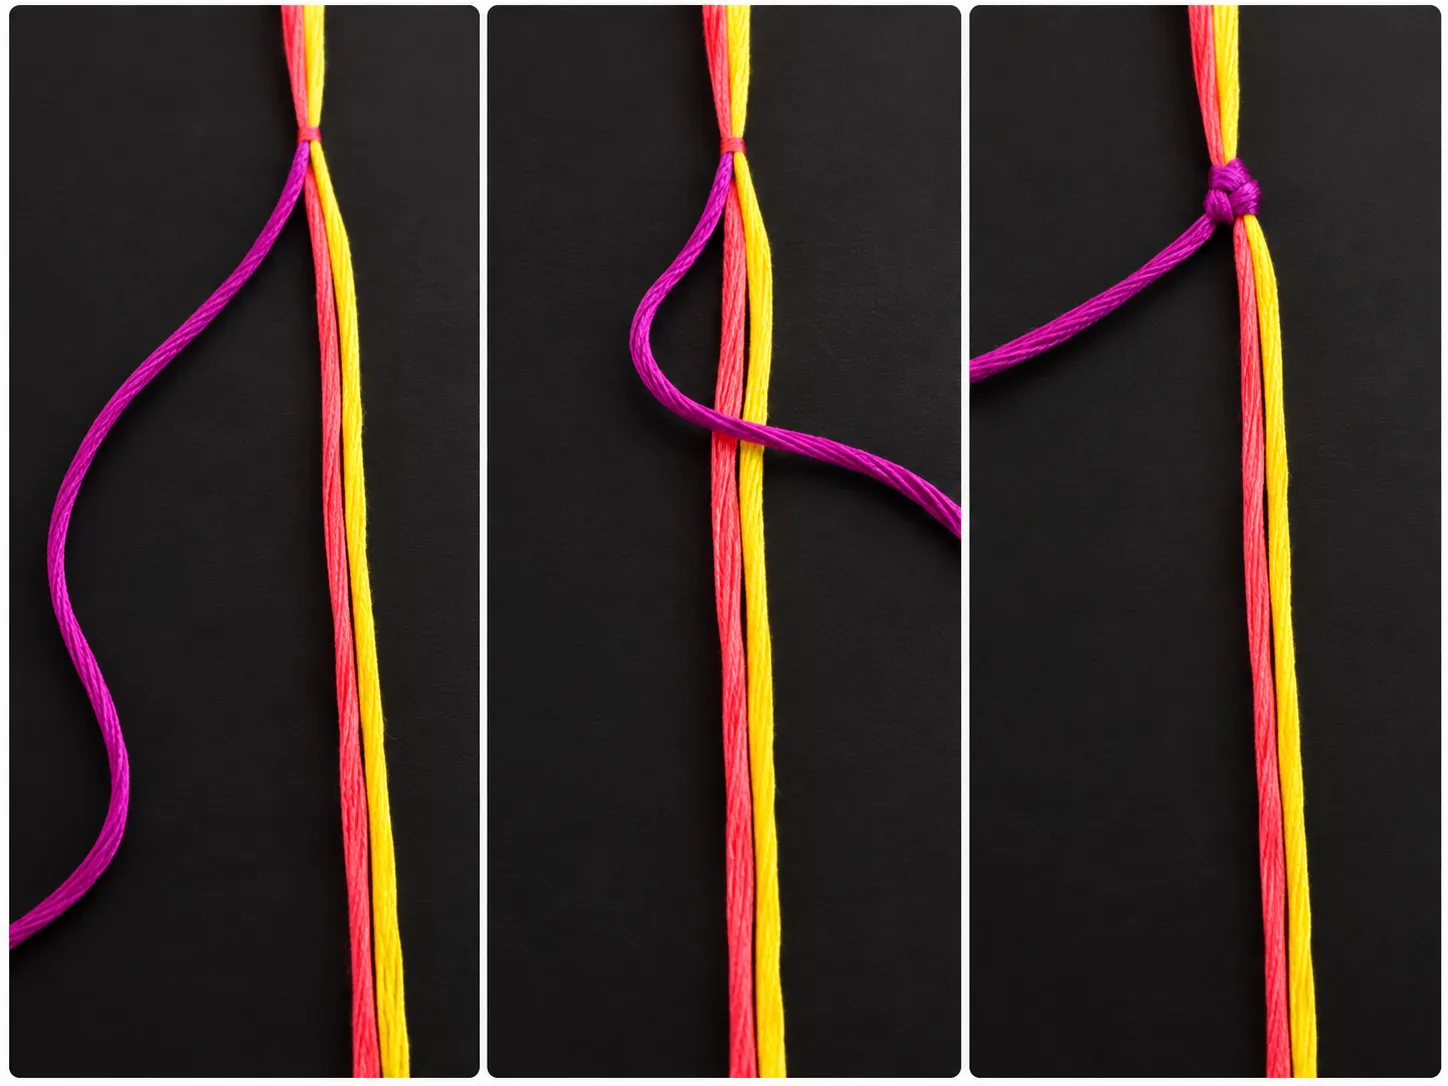
Pull the working strand upward until the knot slides toward the top of the bracelet.
Tighten it neatly against the previous knot.
Do not pull so aggressively that the other embroidery floss becomes distorted.
The knot should feel secure but still look smooth.
Step 9: Repeat the Knot
Continue using the same color.
Repeat the same knot 7 to 15 times, depending on how long you want each color section to be.
The more knots you make, the larger the section of that color will appear.
As you continue, you should notice the bracelet beginning to spiral naturally.
You do not need to manually twist the bracelet.
The repeated knotting technique creates the spiral on its own.
Adding the Second Color
Once the first color section is the size you want, switch to your second color.
In the example, the second color is yellow.
Step 10: Separate the Second Color
Return the first working color to the group.
Now separate the second color.
This second color becomes your new working strand.
The other strands remain together in the center.
Step 11: Make the Same Knot
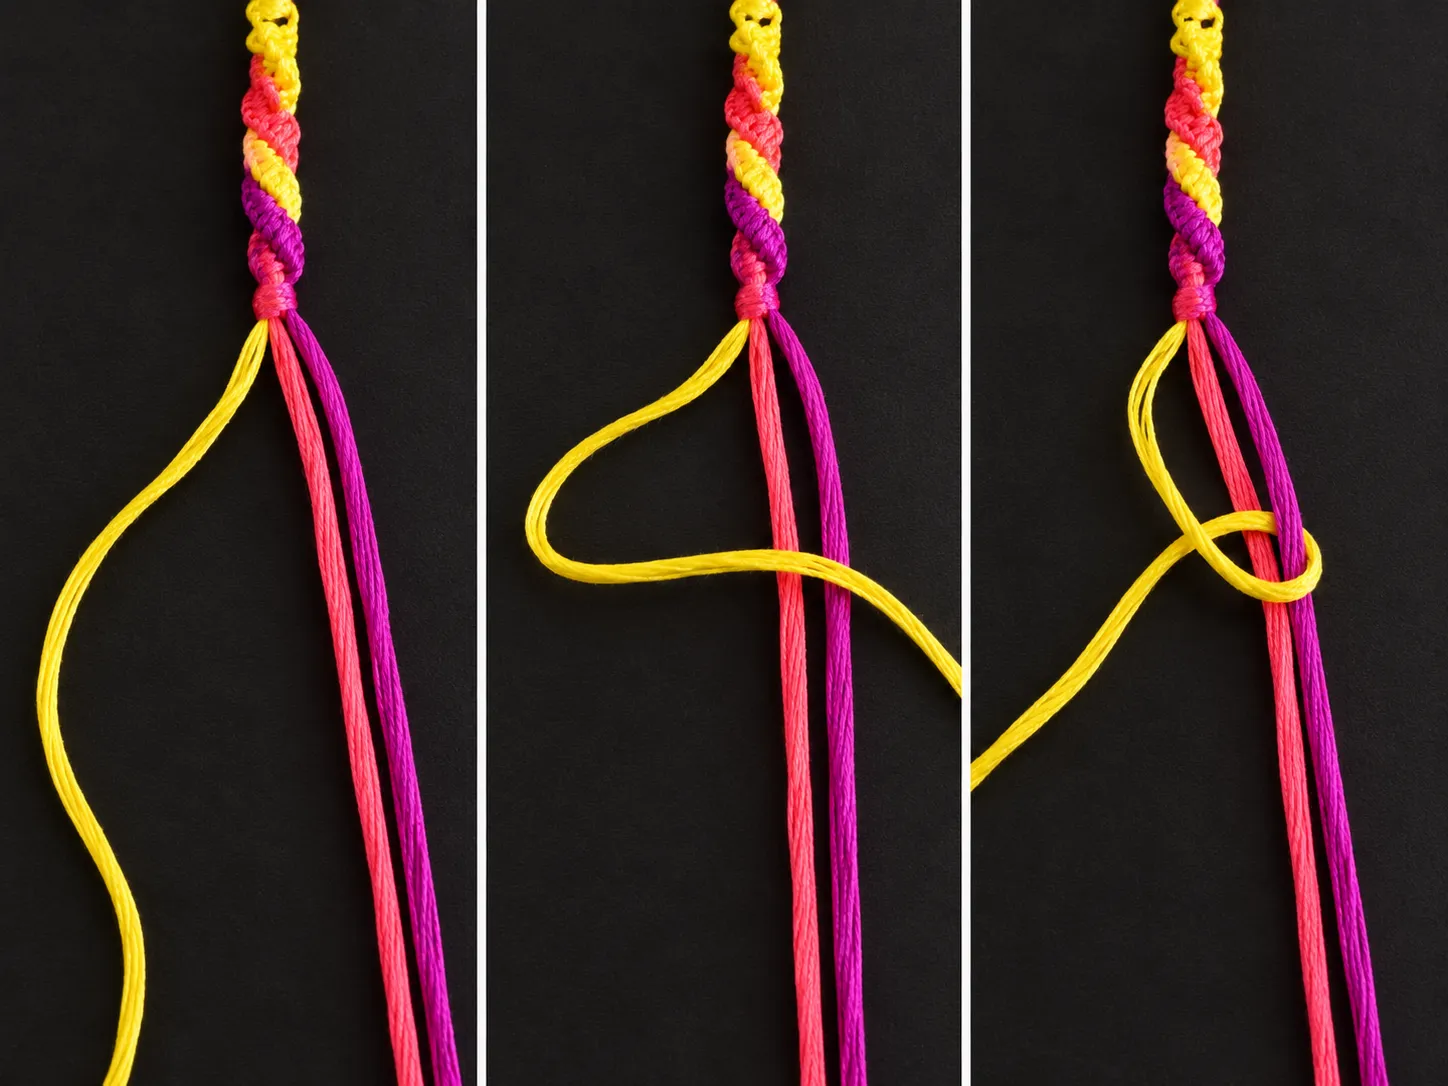
Cross the second color over the other strands.
Pass it underneath.
Pull it through the loop on the same side.
Then slide the knot upward and tighten.
Repeat the same motion.
Try to make approximately the same number of knots that you used for the first color section.
For example, if you made 10 purple knots, make approximately 10 yellow knots.
This helps the color sections look balanced.
Adding the Third Color
Now switch to your third embroidery floss color.
In the example, the third color is pink.
Step 12: Separate the Third Color
Place the second color back with the other strands.
Pull out your third color.
Keep the remaining threads together.
Step 13: Repeat the Spiral Knot
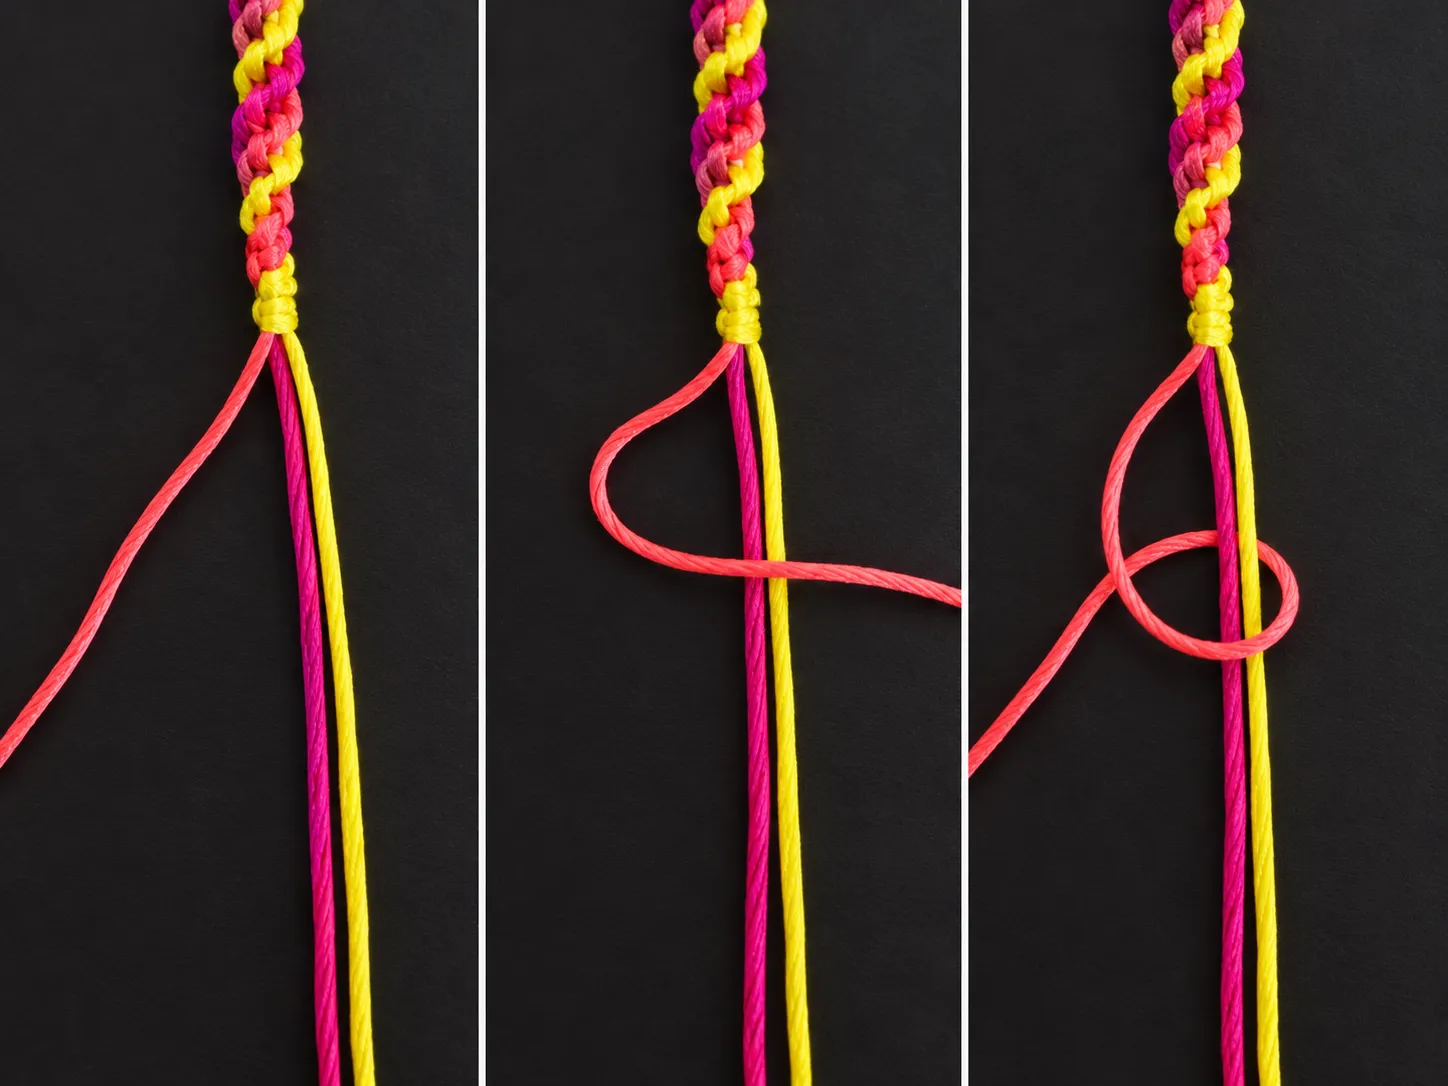
Use exactly the same technique:
- Cross the working thread over the grouped strands.
- Pass it underneath.
- Pull it through the loop.
- Tighten the knot at the top.
- Repeat.
Again, make roughly the same number of knots used for the previous colors.
After completing the third section, you should have three colorful sections wrapping around your bracelet.
Step 14: Repeat the Color Sequence
Return to your first color and begin again.
For example:
Purple → Yellow → Pink → Purple → Yellow → Pink
Continue repeating the colors in the same order.
You can also create your own sequence.
For example:
Blue → White → Blue → Pink
or:
Red → Orange → Yellow → Green → Blue
The method remains the same regardless of the color combination.
Step 15: Check the Bracelet Length
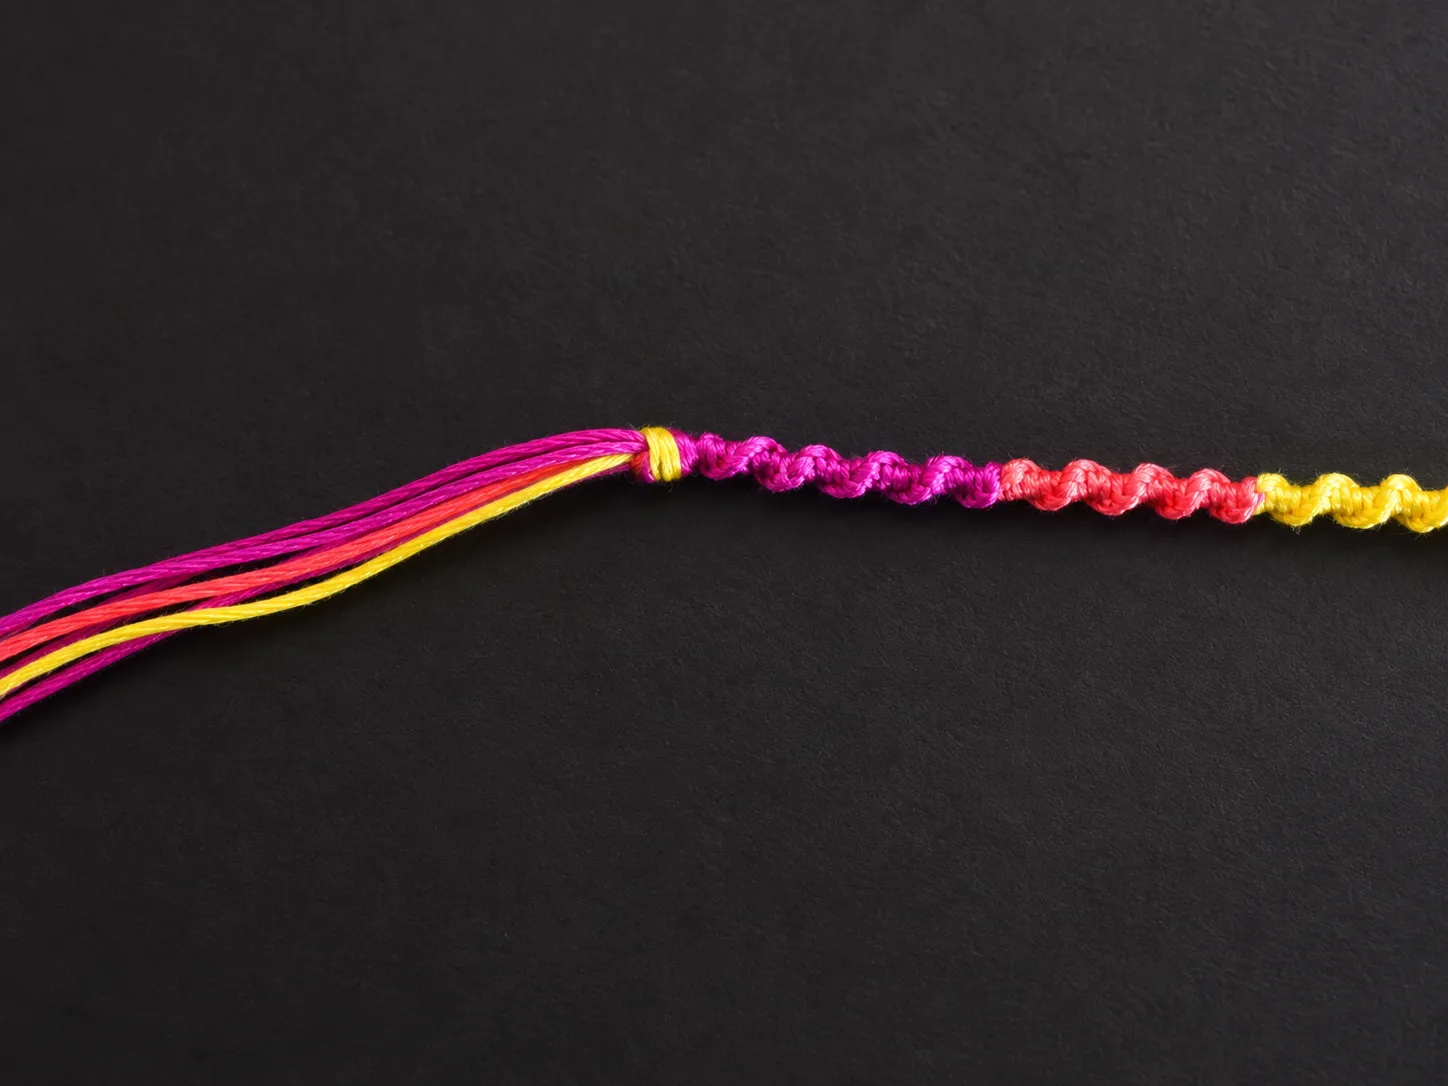
After repeating the color sequence several times, compare the bracelet to your wrist.
Wrap the bracelet gently around the wrist without pulling it too tightly.
If the bracelet is still too short, continue adding more color sections.
Remember to leave enough loose floss at the end for tying the bracelet.
Step 16: Finish the Bracelet
When the bracelet reaches the length you want, gather all the floss strands together.
Tie a firm knot at the end, similar to the knot you made when you started.
You should now have loose floss at both ends of the bracelet.
Use those ends to tie the bracelet around your wrist.
Your spiral friendship bracelet is now finished.
How to Keep the Spiral Looking Even
Use the Same Number of Knots for Each Color
If you want each color section to be approximately the same size, count your knots.
For example:
- Purple: 10 knots
- Yellow: 10 knots
- Pink: 10 knots
Then repeat.
You can also intentionally make some sections longer for a different look.
Keep Consistent Tension
Uneven tension can cause some sections to look wider or tighter than others.
Try to pull each knot with approximately the same amount of pressure.
Keep the Bracelet Secure
If the taped end keeps moving, your knots may become difficult to control.
Replace the tape or use a clipboard if necessary.
Let the Bracelet Twist Naturally
Do not worry if the pattern begins turning as you knot.
That twisting is exactly what creates the spiral design.
How Many Knots Should You Make Per Color?
The original method suggests approximately 7 to 15 knots per color section.
There is no single correct number.
Use fewer knots if you want:
- shorter color blocks
- frequent color changes
- a more mixed appearance
Use more knots if you want:
- larger sections of each color
- bold color blocks
- fewer color transitions
A good beginner starting point is around 10 knots per color.
Two-Color Spiral Bracelet Variation
You do not need three colors.
For a simple two-color version:
- choose two colors
- make 7 to 15 knots using the first color
- switch to the second color
- make the same number of knots
- repeat
For example:
Black → White → Black → White
This creates a simple repeating spiral.
Five-Color Spiral Bracelet Variation
For a brighter friendship bracelet, use five embroidery floss colors.
For example:
Pink → Orange → Yellow → Green → Blue
Work through each color before returning to the first one.
Because there are more colors, you may want to use slightly shorter sections so that all five colors appear several times before the bracelet is finished.
Spiral Friendship Bracelet Troubleshooting
My Bracelet Is Not Spiraling
Make sure you are repeating the same knot in the same direction while working each color section.
The repeating knot naturally causes the bracelet to rotate.
If you alternate knot directions, the bracelet may become flatter instead.
My Spiral Looks Loose
Try tightening each knot a little more before beginning the next one.
Also make sure the starting end is securely taped to your work surface.
My Color Sections Are Different Sizes
Count your knots.
If one section has 8 knots and another has 15, the color blocks will be noticeably different.
That is not necessarily wrong, but counting helps if you want a more uniform pattern.
My Embroidery Floss Is Getting Tangled
Separate the strands frequently.
Let the floss hang naturally and untwist it whenever necessary.
Working on a clean flat surface also helps.
One Strand Is Becoming Too Short
The working strands use more floss than strands that spend more time grouped in the middle.
If you plan to make especially long color sections, start with extra embroidery floss.
Frequently Asked Questions
Is a spiral friendship bracelet easy to make?
Yes. This bracelet is beginner-friendly because it uses one simple repeating knot.
Once you understand how to complete the first section, you repeat the same technique with every color.
How many colors should I use?
You can use as many colors as you like, but 2 to 5 colors is a practical range for this project.
Three colors are especially easy for beginners.
Why does the friendship bracelet spiral?
The spiral forms because the same type of knot is repeatedly tied in the same direction.
As more knots are added, the thread naturally rotates around the center strands.
How many knots do I make before changing colors?
Make approximately 7 to 15 knots per color.
Choose fewer knots for small color sections and more knots for larger blocks.
Can I use embroidery floss for a spiral bracelet?
Yes. Embroidery floss works well for this project and makes it easy to create colorful friendship bracelets.
How long should I cut the embroidery floss?
Measure your wrist, double that measurement, and add approximately 3 inches.
This is the measuring method used for this bracelet.
Can children make this bracelet?
The knotting technique itself is simple, but younger crafters may need help with measuring, cutting, and tying the finishing knots. Scissors should always be used carefully.
Easy Spiral Friendship Bracelet Pattern Summary
For a quick reference, the basic process is:
- Measure your wrist.
- Double the measurement and add 3 inches.
- Cut your embroidery floss.
- Tie the strands together.
- Leave about 2 inches at the top.
- Tape the bracelet to a flat surface.
- Separate your first color.
- Knot it around the remaining strands 7 to 15 times.
- Switch to the second color.
- Repeat with every color.
- Continue until the bracelet fits your wrist.
- Tie a knot at the end.
- Tie the two ends together to wear the bracelet.
Make Your Own Colorful Spiral Bracelet
This easy spiral friendship bracelet pattern is a fun way to practice basic knotting while creating something colorful and wearable.
The pattern is simple enough for beginners, but changing the colors and section lengths gives you plenty of ways to customize the finished bracelet.
Once you are comfortable making the basic spiral version, you can experiment with more colors, longer sections, different floss combinations, and other friendship bracelet designs.
If you are following our bracelet series, this spiral bracelet is another easy project to add to your growing collection of free bracelet patterns for beginners.
Image Credit: Step-by-step images in this tutorial are from instructables.com and are used here for instructional reference.