
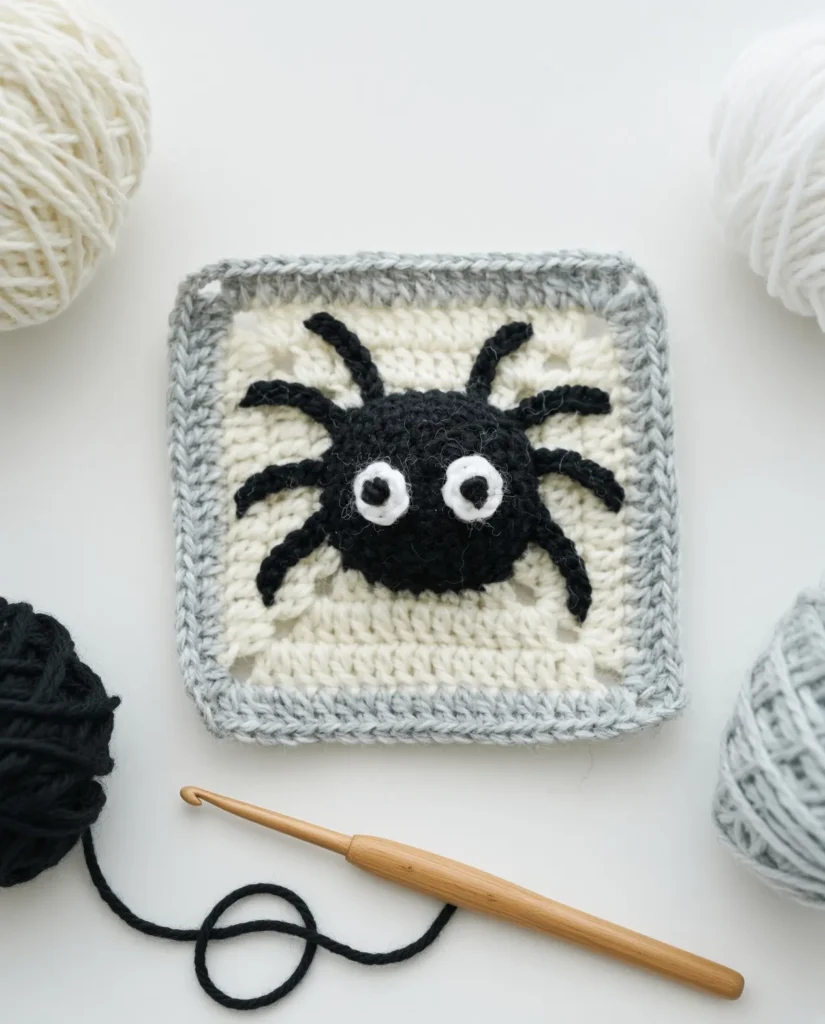
Halloween is the perfect time to add some spooky, handmade touches to your home, and what could be more iconic than a creepy-crawly spider? This free spider granny square pattern features a fuzzy, textured spider body with prominent round eyes sitting perfectly centered on a simple square background. Eight thin legs stretch outward naturally to give your project a wonderfully realistic and eerie look.
This pattern is a fantastic way to practice a variety of techniques, including working in the front loops only for texture, creating French knots for the eyes, and seamlessly attaching crochet legs. It makes an incredible building block for a Halloween afghan, a festive pillow, or a trick-or-treat tote bag. If you are a visual learner, be sure to follow along with the step-by-step video tutorial to see exactly how to assemble this spooky cutie!
For more eerie holiday inspiration, pair this eight-legged friend with a spooky ghost granny square or check out the edgy skull and flower granny square for a striking contrast.
Materials Needed
- Yarn of your choice- 4 colors
- Crochet hook – We are using a 3.00mm hook
- Darning Needle
- Scissors
This pattern uses USA crochet terminology.

Pattern Instructions
The Spider’s Body
Round 1: Start with a magic ring, ch1 to start, 8sc in this loop, sl st to the first sc.
Round 2: ch1 as a standing st, 1sc in the same st, 1 sc-inc. *(1sc, 1 sc-inc)*rep 3 times, sl st to the top of the first sc.
Round 3: ch1 as a standing st. 1sc in the same st, 1sc, 1 sc-inc. *(2sc, 1 sc-inc)*rep 3 times, sl st to the top of the first sc.
Round 4: ch1 to start, 1sc in the same st, 2sc, 1 sc- inc, *(3sc, 1 sc-inc)*rep 3 times, sl st to the top of the first sc.
Round 5: ch1 to start, 1sc in the same st, 3sc, 1 sc-inc, *(4sc, 1 sc-inc)*rep 3 times, sl st to the top of the first sc.
Round 6: ch1 to start, 1sc in the same st, 4sc, 1 sc- inc, *(5sc, 1 sc-inc)*rep 3 times, sl st to the top of the first sc.
Round 7: ch1 as a standing st, 1sc in each st(28sc in total), sl st to the top of the first sc, fasten off.
Round 8: Turn over. Front loop only(FLO) for this round. Join new yarn into any st, ch3 as a standing st(count as 1dc). 1dc in the same st to form a dc-inc, 1hdc, 3sc, 1hdc, 1 dc-inc, ch3. (1 dc-inc, 1hdc, 3sc, 1hdc, 1 dc-inc, ch3) rep 3 times, sl st to the top of the first ch3.
Round 9: ch3 to start(count as 1dc), 1dc in the remaining sts, while (2dc+ch3+2dc) in the corner sp, finally sl st to the top of the first ch3.
Round 10: ch3 to start(count as 1dc), 1dc in the remaining sts, while (2dc+ch3+2dc) in the corner sp, finally sl st to the top of the first ch3, fasten off.
Round 11: Add new yarn into any corner sp. ch3 as a standing st(count as 1dc). 1dc+ch3+2dc in the same corner sp, 17dc. 1dc in the remaining sts, while (2dc+ch3+2dc) in each corner sp. Finally sl st to the top of the first ch3, fasten off.
Legs
Join new yarn into the desired st lies on the edge of the central body part. ch6 meanwhile sew it between stitches to the bottom of the fabric as you go.
Create the other 7 legs in the same way.
Eyes
Make two eye bases:
Leave a tail for later attachment. Start with a magic ring, ch1 as a standing st, 6sc in this loop, sl st to the top of the first sc, pull the tail tightly.
Attach the two eye bases horizontally on the upper half of the spider body, spacing them evenly to create eyes.
Pupils: Make a French Knot in the middle of each eye base:
Come up through fabric from back to front at the desired spot, wrap thread around the needle 1-3 times (more wraps = bigger knot), insert the needle close to the original spot (not the same hole) from front to back, hold the wraps snug while pulling the needle through to the back, pull tight to form a knot. Tie both thread ends together on the back of the fabric to secure.
More Themed Granny Squares
If you enjoy making seasonal and themed motifs, you’ll love adding other festive squares to your collection. For a cozy winter project, try the 3D Christmas tree granny square pattern or stitch up a beautiful Christmas star granny square to keep the holiday spirit going all year long!
Conclusion
Congratulations on creating your Spider Granny Square! This fuzzy, creepy-crawly design is the perfect addition to your Halloween decor. Share your spooky creation in the comments below!
