
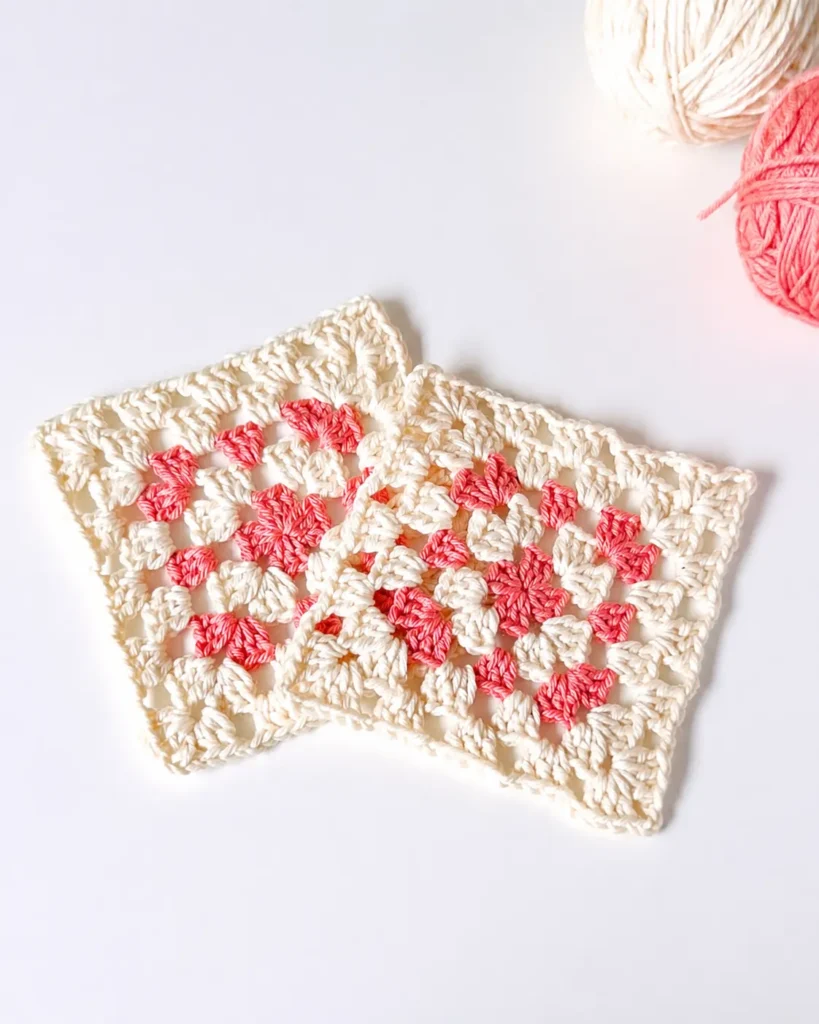
Granny squares are a rite of passage for every crocheter. But if yours are coming out twisted, lumpy, or showing an obvious “seam” line, you are not alone.
The classic granny square is deceptively simple. The good news? You don’t need to be an expert to get flawless results. You just need to tweak a few bad habits.
In this tutorial, I will show you how to crochet a classic granny square that lies perfectly flat, has clean edges, and uses an invisible join so there is no ugly starting chain ruining your round. Plus, I’ll show you how to offset your rows so the seam disappears entirely.
In this article you will learn:
-
How to make a magic circle that won’t come undone
-
The standard 3-dc granny cluster stitch
-
How to execute a perfect invisible join (no slip stitch bumps!)
-
The “offset row” trick for seamless continuous rounds
What You’ll Need
-
Yarn: Any weight works. For beginners, use worsted weight (size 4) acrylic or cotton.
-
Hook: One size matching your yarn label (e.g., 5mm for worsted weight).
-
Notions: Scissors, tapestry needle (for weaving ends), stitch marker (optional).
The Anatomy of a Granny Square
Before we start, understand this: a classic granny square is made of clusters of 3 double crochets (US terms). Each corner gets two clusters separated by a chain 3. Each side gets one cluster separated by a chain 2 or chain 1.
The Master Pattern (US Terms)
If you are in the UK, substitute “Double Crochet (dc)” for “Treble (tr)”.
Round 1: The Center
-
Make a Magic Circle.
-
Chain 3 (counts as your first double crochet).
-
Work 2 double crochets into the circle. (You now have your first “3-dc cluster”).
-
Chain 3 (this forms your first corner).
-
Work 3 double crochets into the circle.
-
Repeat steps 4 & 5 two more times. You should have 4 clusters total.
-
Chain 3, pull the magic circle tight.
-
Do not slip stitch. Instead, cut your yarn leaving a 6-inch tail.
-
Pull the tail through the last loop.
-
Invisible Join: Thread your needle. Go into the top of the starting chain 3 from front to back. Pull through. Then go back into the last stitch you just exited (the top of the last dc) and pull through. This mimics a real stitch. Weave in ends.
Round 2 (Changing Color)
-
Attach your new yarn in any corner space (not between clusters).
-
Chain 3 (counts as dc), then 2dc in the same corner space.
-
Chain 2.
-
In the next corner space (the ch-3 gap from round 1): Work 3dc, ch3, 3dc.
-
Chain 2.
-
Repeat step 4 & 5 around.
-
When you return to the start: Work 3dc, ch2.
-
Join to the top of the starting chain 3 with an invisible join (same as round 1). Cut yarn.
Round 3 (Building the Square)
-
Attach yarn to a corner space (offset from the last row).
-
Chain 3, 2dc, ch2 (side corner made).
-
Side section: Find the ch-2 gap from the previous row. Work 3dc in that gap, ch1.
-
Corner: In the ch-3 corner: Work 3dc, ch3, 3dc. Ch1.
-
Repeat Side and Corner around.
-
Finish with an invisible join.
Pro Tip: *For Row 4 and beyond, the pattern repeats. In every corner: (3dc, ch3, 3dc). On every flat side: (3dc, ch1) in each ch-1 space.*
3 Secrets to a “Perfect” Square
Most tutorials stop at the stitches. Here are the fixes that actually make a difference.

Secret 1: The Invisible Join (Ditch the Slip Stitch)
Almost every pattern tells you to “Slip stitch to the first stitch.” Don’t do it. A slip stitch leaves a thick, diagonal scar across your last cluster.
-
The Fix: Cut your yarn, pull it through, and use a tapestry needle to “fake” the last stitch as shown in Round 1 above. This creates a seamless, professional finish that looks exactly like the rest of your stitches.
Secret 2: Offset Your Rounds
If you start every round in the exact same corner, you will get a diagonal “seam” line running across your square.
-
The Fix: When you start Rounds 3, 4, or 5, do not start in the corner you ended last time. Flip the square over or rotate it and start in a different corner. This distributes the tension and hides the start/end point.
Secret 3: The “Chain 1” Side Rule
Loose, wavy edges happen when your side chains are too long.
-
The Fix: Only use chain 1 between side clusters. Save chain 2 only for the corners. If you use chain 2 on the sides, your square will ruffle. If you use chain 0, it will curl. Chain 1 is the sweet spot for standard yarn weights.
What to Do With Your Perfect Squares
Once you have mastered the technique, you can join your squares to make incredible projects.
-
Mix it up: Pair this classic square with a Daisy Granny Square for a floral meadow blanket.
-
Make a wearable: Use your perfect squares to stitch together a Boho Summer Top.
-
Seasonal fun: Turn a green square into a holiday panel for a Baby Grinch Crochet Pattern blanket.
-
Get Textured: If you love this stitch, try the Cluster Crochet Granny Square Pattern for a different look.
Troubleshooting: Why is my square crooked?
-
The “Twist”: Your magic circle wasn’t tight enough, or you twisted the square when joining. Block your square (pin it flat and spray with water) to fix this.
-
Holes are too big: You used too many chains in the corners. Stick to ch-3 for worsted weight yarn.
-
It looks like a bowl: Your tension is too tight. Try going up one hook size (e.g., from 5mm to 5.5mm).
Ready to keep going?
A granny square is just the beginning. Once you have a stack of these, check out my guide on Cozy Crochet Accessories to turn them into bags, or learn How to Crochet a Hat using the same basic stitches.
Save this post to Pinterest so you never forget the invisible join trick!
Happy stitching, friends.
What is your biggest struggle with granny squares? Let me know in the comments below!
