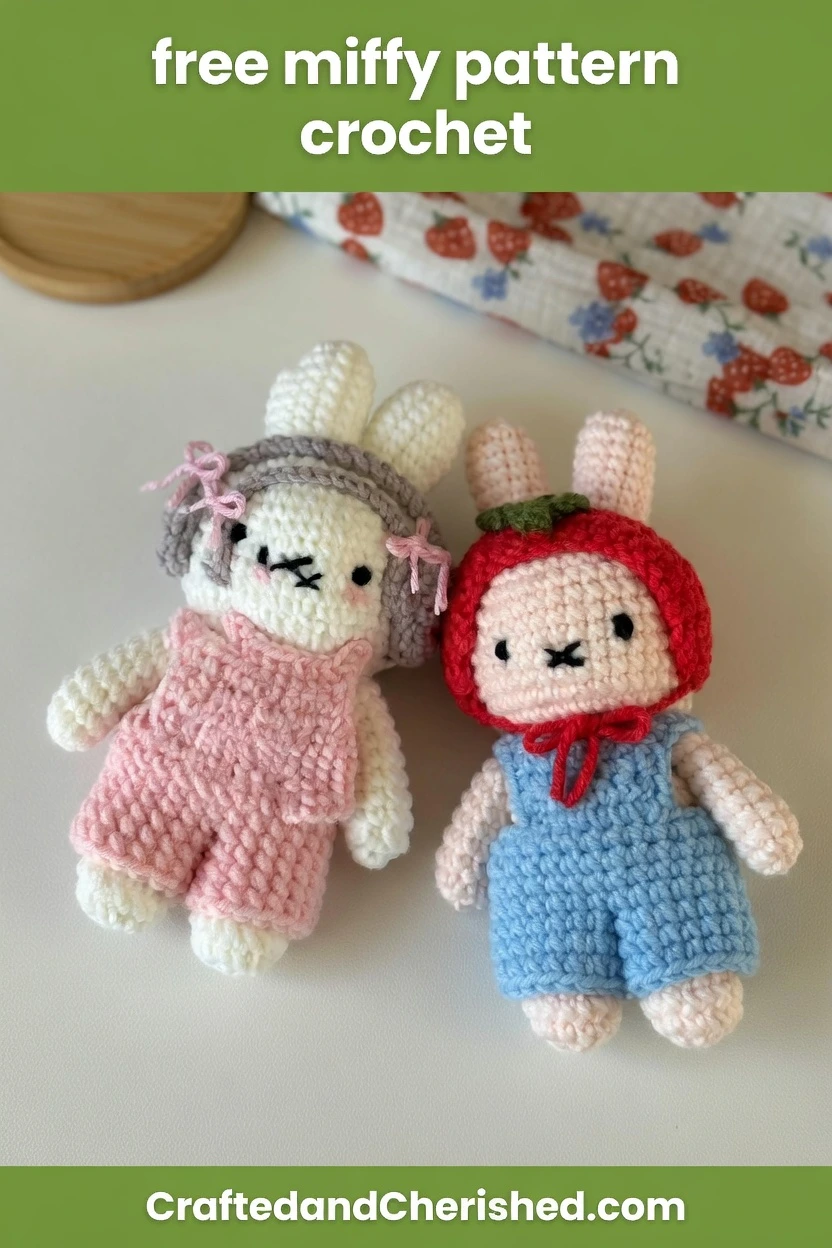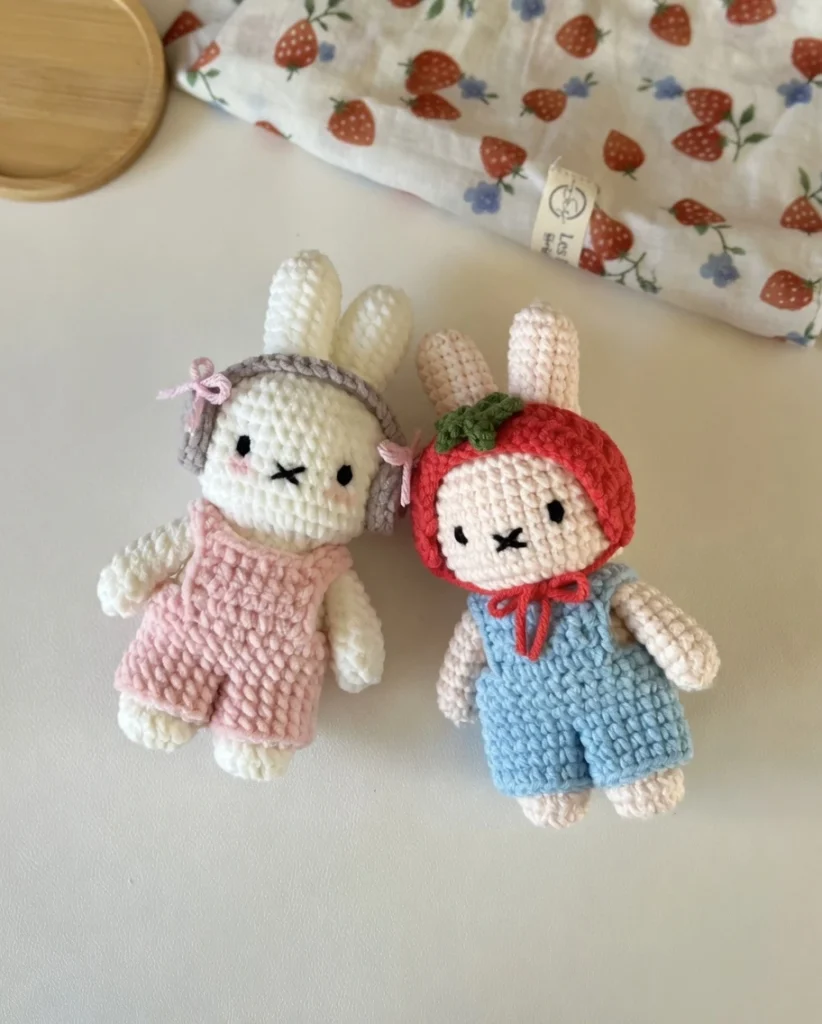
Some crochet patterns are cute. This one is devastatingly cute. Designed by Chubbiesbyash, this Miffy in Overalls amigurumi pattern is a fully dressed plush bunny complete with removable overalls, a bib with straps, and your choice of two accessories — tiny crocheted headphones or an adorable tomato headband with a leaf on top. It’s the kind of project that makes you want to drop everything and pick up your hook immediately.
This is Chubbiesbyash’s fourth Miffy-inspired crochet design, and it’s clear the designer went all out. Unlike simpler amigurumi patterns where the body is a single shape, this Miffy is built from separately crocheted legs that are joined into the body, which flows seamlessly into the head. The arms and ears are made separately and attached along the way. Then the overalls are crocheted as their own piece and dressed onto the finished plush, giving you a complete character with real personality.
The pattern is rated intermediate, but if you’re a beginner who’s ready to level up, this is an excellent graduation project. It introduces leg joining, garment construction, and accessory making — skills that will open up a whole new world of amigurumi design for you. A detailed YouTube video tutorial accompanies every section of the pattern, so you’ll never be left guessing.
What Makes This Pattern Special
Most amigurumi bunny patterns give you a simple body and a head. This one gives you a character. The overalls are a separate crocheted garment with two trouser legs, a front bib, and straps that cross over the back — they actually fit onto the plush like real clothing. The headphones are two small crocheted circles connected by a chain band that sits over the ears. The tomato headband wraps around the head with a tiny leaf cluster on top.
These details elevate the finished piece from a stuffed toy to something with genuine charm and display-worthy personality. It’s the kind of amigurumi that people pick up, examine closely, and can’t believe was handmade.
The construction is also well thought out. The legs are joined with a chain stitch bridge, then the body is built upward with the arms crocheted in at Round 10. The head grows directly from the body starting at Round 12 — no sewing the head on separately. The only sewing required is for the ears, the face embroidery, and the accessories.
Materials You’ll Need
- Yarn: Cotton 5-ply, acrylic, sport weight, or thin chenille yarn in light peach (skin color), blue (overalls), red (tomato headband), green (tomato leaf), and light grey (headphones). A small amount of black yarn for face embroidery.
- Hook: 3mm crochet hook
- Stuffing: Polyester fiberfill
- Tools: Stitch markers, darning needle, scissors
Use the same type of yarn throughout the project — if you use cotton 5-ply for the body, use cotton 5-ply for the overalls and accessories too. This ensures everything fits together proportionally.
Crochet Abbreviations (US Terms)
Ch – Chain | st – stitch | R – round/row | mr – magic ring | sc – single crochet | inc – increase | dec – decrease | hdc – half double crochet | BLO – back loop only | slst – slip stitch | * – repeat | [ ] – total stitch count per round/row
The Full Pattern
Arms (Make 2)
Start with a magic ring.
- R1: 8sc in mr [8]
- R2: (3sc, 1inc) × 2 [10]
- R3–R8: 10sc (6 rounds) [10]
Do not stuff the arms. Close by crocheting into opposite stitches together — you’ll get 4sc from this. Cut the yarn.
Ears (Make 2)
Start with a magic ring.
- R1: 8sc in mr [8]
- R2: (1sc, 1inc) × 4 [12]
- R3–R9: 12sc (7 rounds) [12]
Stuff the ears and cut the yarn, leaving a long tail for sewing.
Legs (Make 2)
Start with a magic ring.
- R1: 8sc in mr [8]
- R2: 8inc [16]
- R3: 16sc [16]
- R4: 4sc, 4dec, 4sc [12]
- R5: 4sc, 2dec, 4sc [10]
- R6: 10sc [10]
After Round 6, make 3 more sc and cut the yarn on the first leg. For the second leg, repeat all rounds including the 3 extra sc at the end, but do NOT cut the yarn — you’ll join the legs next.
Joining the Legs and Continuing to the Body
Start counting from R1 again beginning at the joining round. Mark the 6th sc on the 1st leg, counting backwards from where you cut the yarn.
- R1: Ch1 (on the 2nd leg). Starting from the sc marked on the 1st leg, 1sc into each stitch of the 1st leg, 1sc on the upper loop of the ch, 1sc into each stitch of the 2nd leg, 1sc on the lower loop of the ch. [22]
- R2: (10sc, 1inc) × 2 [24]
- R3: (5sc, 1inc) × 4 [28]
- R4–R8: 28sc (5 rounds) [28]
- R9: (5sc, 1dec) × 4 [24]
Join the hands in R10.
- R10: 4sc, 4sc (together with hand), 8sc, 4sc (together with hand), 4sc [24]
- R11: (2sc, 1dec) × 6 [18]
The Head (Starting from R12)
- R12: 18inc [36]
- R13: (8sc, 1inc) × 4 [40]
- R14–R21: 40sc (8 rounds) [40]
- R22: (3sc, 1dec) × 8 [32]
- R23: (1sc, 1dec, 1sc) × 8 [24]
- R24: (1sc, 1dec) × 8 [16]
- R25: 8dec [8]
Close the head. Using black yarn, embroider the eyes on R17 with 7 stitches between them. Embroider the mouth one row below the eyes, centered. Sew the ears onto the head.
The Overalls
Use any color you like — the original uses light blue. Make sure to use the same yarn type as the body. The overalls use joined rounds: connect with a slst at the end of each round and start every new round with Ch1. The Ch1 and slst are NOT included in the total stitch count.
Start with a slip knot and make 29ch.
- R1: Starting from the 2nd ch from hook, 1sc into each ch, make a slst (into the 1st sc of R1) [28]
- R2–R3: Ch1, 28sc, 1slst (2 rounds) [28]
After R3, divide into two sections for the trouser legs. Start counting from R1 for each trouser.
1st Trouser
- R1: Continuing from R3, Ch1, 14sc, Ch4, 1slst into the 1st sc [14sc, 4ch]
- R2: Ch1, 14sc, 4sc (on upper loops of the ch), 1slst [18]
- R3–R4: Ch1, 18sc, 1slst (2 rounds) [18]
Cut the yarn and weave in the end.
2nd Trouser
Start from the stitch next to the slst of R3.
- R1: Ch1, 1sc, 4sc on ch, 13sc, 1slst [18]
- R2–R4: Ch1, 18sc, 1slst (3 rounds) [18]
Cut the yarn and weave in the end.
The Bib
Put the overalls onto your plushie to find the 6 middle stitches on the very first row. Crochet the bib directly onto that first row.
- R1: Ch1, 6sc [6]
- R2–R3: Ch1, Turn, 6sc (2 rounds) [6]
Cut the yarn.
Edging and Straps
Crochet along three sides of the bib to neaten the edges and add straps. Starting from the bottom of the 1st row of the bib: 3sc (on 1st side), 17ch, 16sc, 6sc (on the last row of the bib), 17ch, 16sc, 3sc (on the last side).
Cut the yarn and weave in the ends.
The Accessories
Headphones
Start with a magic ring, using any color of your choice.
- R1: 7sc in mr, 1slst [7]
- R2: Ch1, 7inc, 1slst [14]
- R3 (BLO): Ch1, 14sc, 1slst [14]
Cut the yarn. Make a second piece and do NOT cut the yarn. On the 2nd piece, 15ch, make 2slst onto the 1st piece, crochet along each ch with 1slst to come back to the 2nd piece. When you reach the 2nd piece, make 1slst and cut the yarn. Sew the headphones onto the head.
Tomato Headband
Start with a slip knot using red yarn.
Ch 18.
- R1: Starting from the 3rd ch from hook, 16hdc [16]
- R2: Ch2, Turn, 16hdc [16]
Continue making 2sc on the side of each row, for a total of 4sc. Ch1, Turn, 2dec. Ch1, Turn, 1dec. Cut the yarn, leaving a long tail. Repeat the same step on the other side.
Tomato Leaf
Into mr, (ch3, 1slst, 1sc, 1slst into mr) × 5.
Cut the yarn, leaving a long tail. Sew the headband onto the head, then sew the tomato leaf at the top.

Tips for Getting the Best Results
The leg join is the trickiest part — use the video. Joining two separate leg pieces into a continuous body round is a technique that’s much easier to understand visually than from written instructions alone. The YouTube tutorial walks through this step in detail, and watching it once before you attempt it will save you a lot of frustration.
Count your stitches at the arm join. Round 10, where the arms are crocheted into the body, is another spot where the stitch count can go wrong. You’re working 4sc through both the body stitches and the arm stitches simultaneously, which feels unfamiliar the first time. Keep your stitch marker in place and count carefully.
Try the overalls on before crocheting the bib. The bib is worked directly onto the first row of the overalls, and you need to find the 6 center stitches on the front. Putting the overalls on the plushie first ensures the bib ends up centered on the chest rather than off to one side.
Embroider the face before closing the head. You’ll want a firm, stuffed surface to embroider on, but it’s easier to anchor and hide your yarn tails while you still have access to the inside. Embroider the eyes on R17 with 7 stitches between them, and place the mouth one row below, centered between the eyes.
Pick your accessory — or make both. The headphones give Miffy a modern, music-loving personality. The tomato headband gives her a whimsical, garden-fresh charm. Both are quick to make and completely change the character’s vibe. Many makers end up creating two Miffys just so they can have one of each.
Why This Pattern Is a Great Intermediate Challenge
If you’ve been crocheting amigurumi at the beginner level — simple one-piece animals, no-sew designs, basic shapes — this Miffy pattern is the natural next step. It introduces several intermediate techniques without overwhelming you: joining separate leg pieces into a body, crocheting arms directly into a round, constructing a separate garment that fits onto the finished plush, and working small accessories with fine details.
Each of these skills appears in countless other intermediate and advanced amigurumi patterns. Once you’ve completed this Miffy, you’ll have the confidence and technique to tackle dressed dolls, multi-piece characters, and accessories across a wide range of designs. As the designer puts it, this could be your crochet graduation project from beginner to intermediate.
What Crafters Are Saying
This pattern has earned enthusiastic feedback from the crochet community. Makers praise how well-explained the instructions are, especially combined with the video tutorials. Several beginners have reported successfully completing the project as their first intermediate pattern. Others have gotten creative with customization — swapping the tomato headband for a strawberry or blueberry version, or experimenting with different overall colors. The consensus is clear: this Miffy is adorable, well-designed, and absolutely worth the effort.
Pattern Credit
This free pattern was designed by Chubbiesbyash. You can find more Miffy-inspired projects, video tutorials, and adorable crochet creations on their blog at chubbiesbyash.com, as well as on their Instagram and YouTube channel. If you make a Miffy in Overalls, crediting the designer supports their work and helps the crochet community discover more free patterns.
Happy crocheting — and enjoy dressing up your new Miffy!