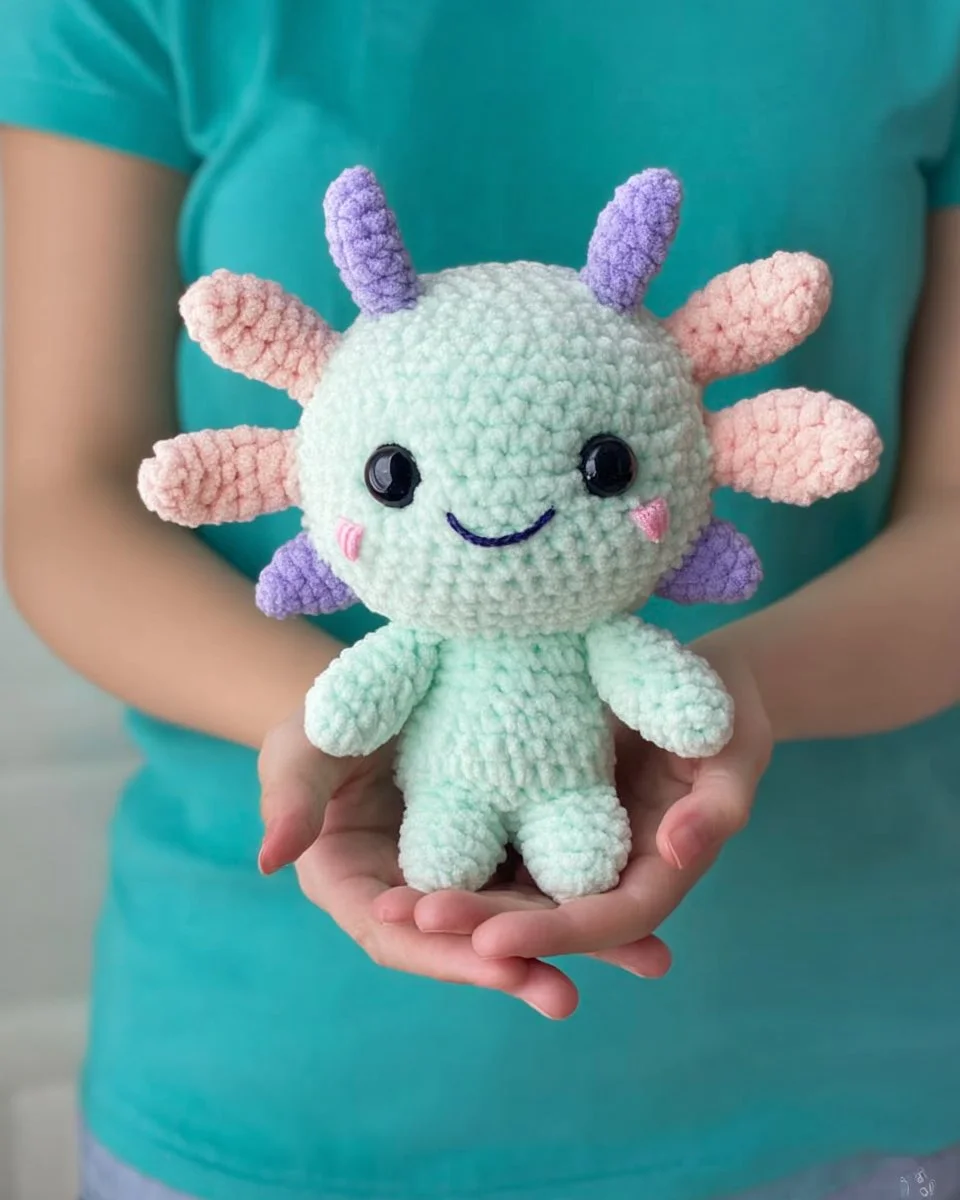
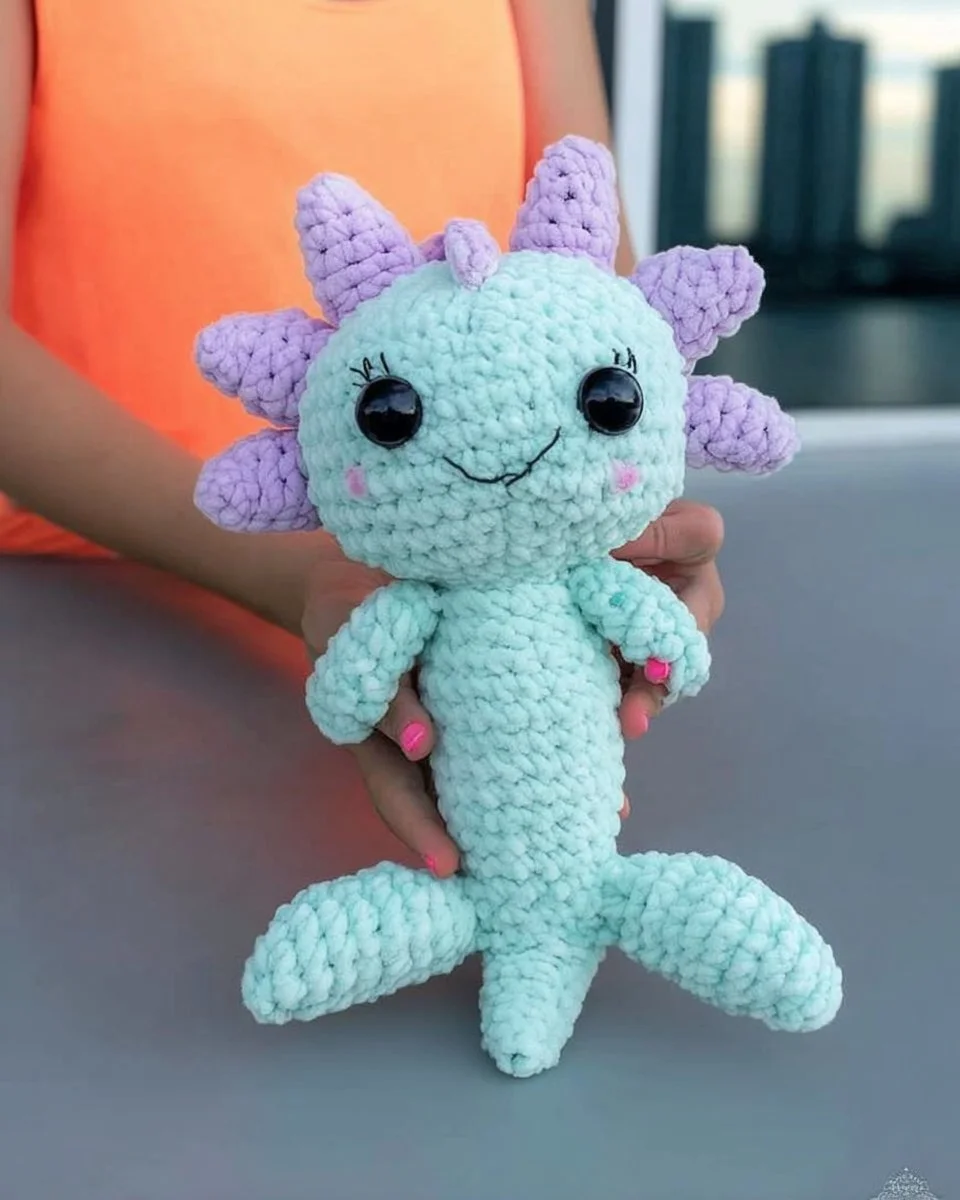
Plush Axolotl Amigurumi – Free Crochet Pattern
Welcome to the whimsical world of crochet, where creativity knows no bounds! In this article, we’re diving into the delightful realm of amigurumi, focusing specifically on creating an adorable Plush Axolotl. Known for their unique appearance and friendly demeanor, Axolotls have captured the hearts of many. With a little yarn and some crochet skills, you can bring this charming creature to life in the comfort of your own home by following our free crochet pattern.
What is Amigurumi?
Amigurumi is a Japanese word combining "ami," meaning crocheted or knitted, and "nuigurumi," which means stuffed doll. These cute, stuffed creations can include animals, characters, and objects, made through specific crochet techniques. They are generally worked in a continuous spiral using single crochet stitches, making them perfect for interactive toys or decorative items.
Materials Needed
Before we jump into the pattern, let’s gather the materials you’ll need to create your own Plush Axolotl amigurumi:
- Yarn: Medium weight (worsted) yarn in pink (for the body), white (for the belly), and black (for the eyes). You can use any brand you prefer; just ensure they are all of the same weight.
- Crochet Hook: Size H (5.0 mm) or appropriate size for your yarn.
- Stuffing: Polyester fiberfill or any stuffing material you prefer.
- Safety Eyes: 12mm black safety eyes or you can crochet them as instructed in the pattern.
- Stitch Marker: To keep track of your rounds.
- Tapestry Needle: For weaving in ends and sewing pieces together.
- Scissors: For trimming the yarn.
Abbreviations Used
- ch = chain
- sc = single crochet
- inc = increase (two single crochet in one stitch)
- dec = decrease (single crochet two stitches together)
- sl st = slip stitch
- st = stitch
- rnd = round
Plush Axolotl Amigurumi Pattern
Head and Body
- Magic Ring: Make a magic ring.
- Rnd 1: 6 sc in magic ring. (6)
- Rnd 2: Inc in each st around. (12)
- Rnd 3: (sc in next st, inc in next st) repeat around. (18)
- Rnd 4: (sc in next 2 st, inc in next st) repeat around. (24)
- Rnd 5-12: sc in each st around. (24)
- Rnd 13: (sc in next 2 st, dec) repeat around. (18)
- Rnd 14: (sc in next st, dec) repeat around. (12)
- Rnd 15: dec around. (6)
Continue to stuff the head firmly with polyester fiberfill as you finish.
Fasten off, leaving a long tail for sewing.
Belly
- Magic Ring: Make a magic ring.
- Rnd 1: 6 sc in magic ring. (6)
- Rnd 2: Inc in each st around. (12)
- Rnd 3: (sc in next st, inc in next st) around. (18)
- Rnd 4: (sc in next 2 st, inc in next st) around. (24)
Fasten off and leave a long tail for sewing.
Legs (Make 4)
- Magic Ring: Make a magic ring.
- Rnd 1: 6 sc in magic ring. (6)
- Rnd 2: (sc in next st, inc in next st) around. (9)
- Rnd 3-4: sc in each st around. (9)
- Rnd 5: (sc in next st, dec) around. (6)
Fasten off and leave a long tail for sewing.
Fins (Make 2)
- Ch 6.
- Row 1: Starting from the second ch from the hook, sc in next 5 st. (5)
- Row 2: Ch 1, turn. Dec, sc in next 3 st, dec. (3)
- Row 3: Ch 1, turn. Dec, sc in last st. (2)
- Row 4: Ch 1, turn. Dec. (1)
Fasten off and leave a long tail for sewing.
Assembly
- Sew the belly to the bottom of the head and body using the tapestry needle.
- Attach the legs evenly around the base of your Axolotl’s body, ensuring they are securely sewn in place.
- Sew the fins to each side of the head, positioning them to resemble the gills of an Axolotl.
- Attach safety eyes between the 7th and 8th round from the top of the head, using the black yarn for additional detailing (if desired).
Finishing Touches
Once all parts are sewn together, weave in any visible yarn ends with your tapestry needle, ensuring a clean finish. You can also embroider a smile or add further embellishments as per your preference.
Customization Ideas
Your Plush Axolotl doesn’t have to look exactly like everyone else’s! Here are some fun ideas to customize your amigurumi:
- Color Variants: Change the main color to orange, purple, or even a gradient for a more unique look.
- Accessories: Knit tiny hats, scarves, or even tiny backpacks to make your Axolotl more adorable.
- Size Variations: Experiment with different yarn weights and crochet hook sizes to create a larger or smaller plush.
Why Crochet Amigurumi?
Crocheting amigurumi is not only a creative outlet; it also provides practical benefits:
- Stress Relief: The rhythmic motions of crocheting can be relaxing and meditative.
- Skill Development: Each project enhances your crochet skills, from basic stitches to complex patterns.
- Gift Giving: Handmade gifts carry sentimental value. Your loved ones will cherish a plush Axolotl made with love.
Conclusion
Now you’ve got all the tools and a detailed pattern to create your very own Plush Axolotl amigurumi. This friendly creature is sure to bring joy to anyone who sees it. Happy crocheting!
Final Note
Don’t forget to share your handcrafted Axolotl on social media. You can even inspire others to take up crochet with your finished project! For any questions or troubleshooting, feel free to leave comments below.
Enjoy your crocheting journey!